
Poster Making in PowerPoint
Using PowerPoint 2016 on Windows, these instructions will show you how to create a poster as a single PowerPoint "slide". You will then be able to save this as a PowerPoint document, PDF file, or image (JPG, PNG, etc.).
- Open a new presentation in PowerPoint. You should be looking at something like this:

- To set the page size to something suitable for a poster, select the "Design" tab.

- Then select "Slide Size" (far right) and "Custom Slide Size" and you should see a window like this:
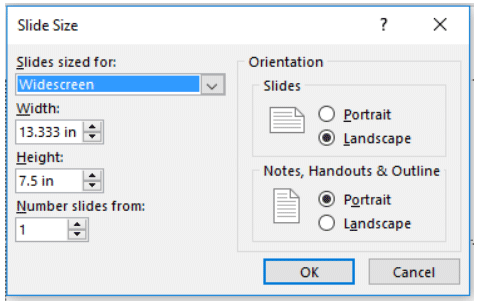
- Simply change the width and height to dimensions more suited to a poster (i.e. 24 inches by 36 inches). Click "OK".
- As your poster is currently empty, you can choose either "Maximize" or "Ensure Fit". If you are changing the page size for a poster with content, try each and Undo if needed. Which works better will vary by poster.
- It might be helpful to have the rulers displayed as you work. Select the "View" tab and check "Ruler" if needed.

- It is recommended you save frequently. Save now. It is assumed you will save as a PowerPoint Presentation (.pptx) file; this has been the default file format for PowerPoint since 2007.
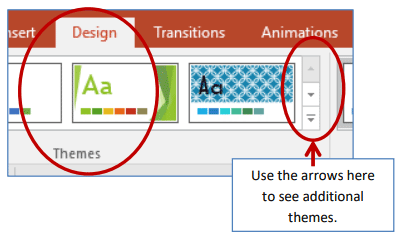
A white background for your poster is just fine and possibly even recommended; it typically results in a clear, easy-to-read poster. But PowerPoint has a number of background styles. These can be accessed through the "Design" tab. Select "Format Background" for general styles (solid and gradient fills, etc.) or more stylized background designs (referred to as "Themes" in the software) are displayed by row in the Themes portion of this tab:

You are ready to begin adding content. In these instructions, we will use the options found in the "Insert" tab to add content and will focus on adding/inserting text and images. Additional content can also be added. For example, Microsoft Excel spreadsheets can be inserted into your poster; use the Help to learn more. The Help is accessed by clicking "Tell me what you want to do…" located to the right of the main tabs.
Inserting and Working with Text
- You can keep and work with, or select (by clicking on the boundary so it is a solid line) and delete the "Click to Add Title" and subtitle boxes on your slide/poster.
- On the "Insert" menu select "Text Box", then move the cursor over the
 approximate location on your poster you want to place the text and begin typing. Don’t worry about the exact location of your text box on the poster as you can move/refine the text box location later; PowerPoint has some handy tools to do that. Note when you click on the poster to begin entering text PowerPoint switches the active tab to the "Home" tab which has a lot of the text controls (font type, size, bold, etc.).
 - If you have text already written elsewhere, say in Microsoft Word or other word processing software, that you want to move to the poster; select and copy the text in Word then just Paste (you can use the Paste button located all the way to the left on the "Home" tab) and the text will appear in a text box on your poster/slide.
- Once the text is in, you work with it much the way you do in a word processing software. The difference is in PowerPoint you have it in a text box and these have controls. These controls are accessed by right-clicking (on a PC) in the text box (or on the outline of the text box) and using the "Format Shape" side window that appears. The screen capture below shows you a partial view of the Format Shape window with "Text Options" selected.

Important General Note: In the upper left-hand corner of the PowerPoint application are the Undo and Redo tools. These can be lifesavers and, at a minimum, should encourage exploration. One click and your last action is undone.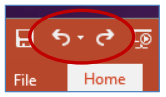
Grouping and Aligning Objects
- The other valuable set of tools to be aware of become available when you have multiple items (say 2 text boxes, or 3 text boxes and 2 images, etc.) and you want to apply a behavior/rule to all of them. An example is if you want multiple items to be top aligned
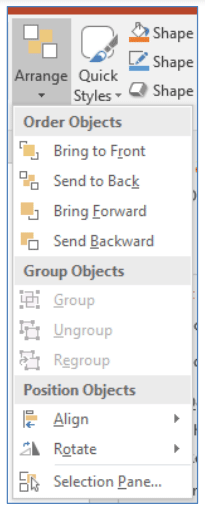 . Select the items you are interested in applying the rule/behavior to (by clicking on the outline of the first one so that it is solid, then holding the "Shift" key down and selecting the next one, etc.). Then, on the "Home" tab, click the "Arrange" button and you will see this:
 - Group Objects and Align are 2 very useful sets of controls. When you group items, they act as a single item, allowing you to apply a behavior to all of them, or to, for example, move them all at once. You will lose some of the functions available to single (ungrouped) items. If you discover you need that functionality again, you must ungroup the items. Grouping, aligning, etc. are not permanent.
* The Order Objects options are also useful but are typically applied to a single item - Also note when you are working with text the "Drawing Tools: Format" tab appears and contains these same tools and menus (and many more).
Inserting and Working with Images
- On the "Insert" menu select "Pictures" (but note other options, Screenshot, etc.) and, using the "Insert Picture" window that appears, navigate to the location of the image you want to include in your poster. Select the image, then click the "Insert" button. The picture will appear on your slide/poster.

- When you select (click on) the image in PowerPoint, two things will happen. One is the image handles will appear; these are the little circles and squares around the outside edge of the image, and are described below. Two is the "Picture Tools: Format" tab will appear. Both are shown in the screen capture below. Items numbered in the screen capture are described below.

Additional Tips
There are many other useful functions available; we will introduce 5 favorites below:
- The image handles allow you to change the size of the image. The circles in the corners will increase (or decrease) the image proportionally in both width and height. The circle in the middle of each side will stretch the image; note that this function distorts the image away from its original dimensions.
- The circular arrow above the top-middle handle allows you to rotate the image in a freehand way.
- If you want to rotate the image a pre-defined/exact amount, it is recommended you use the "Rotate" option in the "Arrange" portion of the menu. Some of the options in the "Arrange" menu are discussed under 'Grouping and Aligning Objects' in 'Adding Content'.
- With an image selected, clicking on this button replaces the handles with short "black bars". Cropping allows you to hide portions of the image.
- If you are sharing your slide/poster, it is a good idea to also save it as a PDF. Click the "File" tab, "Export" and "Create PDF/XPS Document". Default save as type is a PDF.