
Instructions for Chosen Name and Contact Form
To update your personal information on Banner, please review the instructions below. The instructions on this page will serve as a guideline for how to update contact information, chosen name, parent/guardian data, and emergency contacts.
Step 1: Access Banner Personal Info
- Navigate to the “Update Personal Information Instructions” page located at Banner Test.
- Click the link “Update Personal Information” under step 1 to proceed to the application which should open a new tab in your browser.
* Clicking the above link will prompt you to log in, please use your Alfred University e-mail address and password.
Step 2: Contact Info
For an explanation of the page, click the question mark near “Contact Info.”
- Navigate to the "Contact Information" Tab.
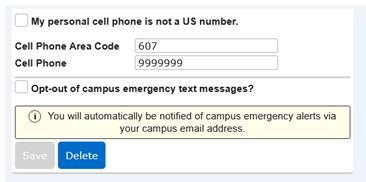
- Enter or edit your phone number and click “Save.” Please enter the area code in the top box and enter the rest of your phone number in the bottom box. If your number is not a US number, check the top box. If you would like to opt out of Rave Alert messages, check the bottom box.
- Adding a mailing address:
- Click the “Add Address” button.

- Choose “Mailing” for the “Address Type.”

- Fill in remaining fields, taking notice of the required fields marked by an asterisk (*).
- Click “Save.”

- Click the “Add Address” button.
- Adding a temporary address:
- Click the “Add Address” button.
- Choose “Temporary” for the “Address Type.”

- Fill in remaining fields, taking notice of the required fields marked by an asterisk (*).
- Click “Save.”
- Verify that all information is correct as you entered it.
- Verify your contact information by clicking the “Verify Contact Information” button, checking the “I Agree” box, and clicking the “Save” button.
IMPORTANT NOTE: In addition to saving your information on each of the tabs, it is essential to also verify that the information is correct on each of the tabs to complete the form.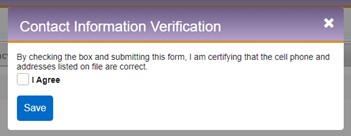
Step 3: Chosen Name
For an explanation of the page, click the question mark near “Chosen Name.”![]()
- Navigate to the "Chosen Name" Tab.
- Save your chosen name by filling out the “Chosen First Name” field and clicking “Save.”

- Verify that all information is correct as you entered it.
- Verify your biographical data by clicking the “Verify Chosen Name” button, checking the “I Agree” box, and clicking the “Save” button.
IMPORTANT NOTE: In addition to saving your information on each of the tabs, it is essential to also verify that the information is correct on each of the tabs to complete the form.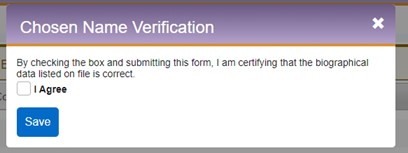
Step 4: Parent / Guardian Data
For an explanation of the page, click the question mark near “Parent / Guardian Data.”
- Navigate to the "Parent / Guardian Data" Tab.
- Adding a parent / guardian:
- Click the “Add Parent / Guardian” button.

- Fill in remaining fields, taking notice of the required fields marked by an asterisk (*).
- Click “Save.”
- Click the “Add Parent / Guardian” button.
- Verify that all information is correct as you entered it.
- Verify your parent / guardian information by clicking the “Verify Parent(s) / Guardian(s)” button, checking the “I Agree” box, and clicking the “Save” button.
IMPORTANT NOTE: In addition to saving your information on each of the tabs, it is essential to also verify that the information is correct on each of the tabs to complete the form.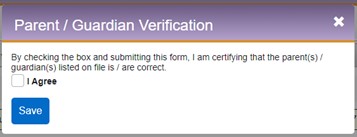
Step 5: Emergency Contacts
For an explanation of the page, click the question mark near “Emergency Contacts.“![]()
- Navigate to the "Emergency Contacts" Tab.
- Adding an emergency / missing persons contact:
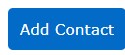
- Click the “Add Contact” button.
- Fill in remaining fields, taking notice of the required fields marked by an asterisk (*).
- Priority fields will only have values when there are one or more contacts in the database.
- Choose a contact type.
- Click “Save.”
- Click the “Add Contact” button.
- Verify that all information is correct as you entered it.
- Verify your emergency / missing persons contact data by clicking the “Verify Emergency Contacts” button, checking the “I Agree” box, and clicking the “Save” button.
IMPORTANT NOTE: In addition to saving your information on each of the tabs, it is essential to also verify that the information is correct on each of the tabs to complete the form.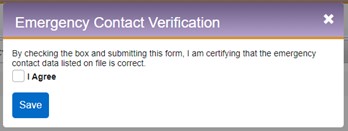
Step 6: After Updating Info
- When done close the current browser tab, which should then show the “Update Personal Information Instructions” page.
- Finally, click on the “Click here” link in step 5 to be returned to the Self-Service menu log in.
Q. What if I cannot log in to the application?
A. Be sure you are using your AU credentials. If the problem persists, please take a screenshot of the error, and send an email to [email protected].
Q. What if I have encountered an error while attempting to save my data?
A. Take a screenshot of the error, email the screenshot to [email protected] with an explanation of the steps taken that resulted in the error.